How do I sponsor a Snapchat filter using Ads Manager?
Sponsor a Snapchat filter is an important lever for brands looking to achieve different objectives. Sponsored Snapchat filters make it possible to reach a wider audience, but also to target specific audiences based on demographic criteria or centres of interest. Here's a complete guide to help you sponsor your Snapchat lens on the app.
Step 1: Connect to Lens Studio to sponsor a Snapchat filter
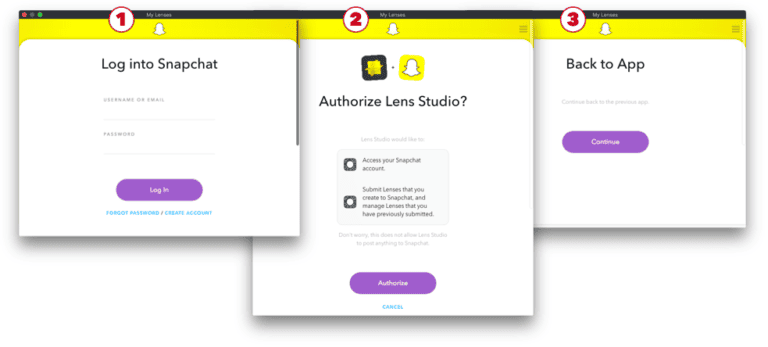
When you want to sponsor a Snapchat filter, you need to log in to Lens Studio which is the software used to create and publish all the lenses on the application. Make sure you log in with the same credentials as for the Ads Manager account. If this is the first time you've logged into Lens Studio, follow the steps on your screen to link Lens Studio to your Snapchat account.
Contact
Step 2: Publish the Snapchat filter on Lens Studio

Before sponsoring a Snapchat filter, you need to publish your lens so that the platform can analyse the content and validate it. To do this, you need to open your filter file in the Lens Studio software and click on "Publish Lens".
Next, choose "Business Lens" which will allow you to link this filter to your brand and to Snapchat's Business Manager and Ads Manager accounts. If you don't see this option, it's because you're not logged in with the same credentials as your Ads Manager account.
After that, all that's left to do is choose the organisation and Ads Manager account with which you want to manage your Snapchat filter. Be very careful with the Ads account, because once the filter is published, you can't move it to another account (unless you repeat all the steps).
Finally, click on "Submit Lens" and the second step is complete.
You wish to create and sponsor a Snapchat filter? Our agency specialising in creating Snapchat filters will take care of everything! Fill in this form and one of our experts will contact you.
Step 3: Switch the Snapchat filter to Ads Manager
Before finalising and sponsoring a Snapchat filter, it's important to know that it can no longer be modified. So make sure you've made all the changes and checks before continuing. To finalise the sending of your Snap lens to Ads Manager, your filter must have the status "Action Needed". Then click on "Finalize for Ads Manager" (blue button) and follow the instructions.
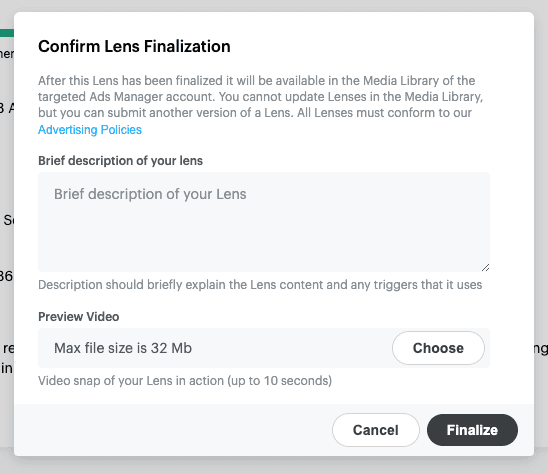
The description must be filled in with the characteristics of the filter, the triggers, the content, etc. The more precise your description, the shorter the analysis time. Before a Snapchat filter can be sponsored, moderators check the content and confirm that it complies with Snapchat and Lens Studio policies.
That's why the video must be as relevant as possible and show every feature of your filter, so that the moderators can understand how Lens works.
Step 4: Sponsor a Snapchat filter on Ads Manager
Once the moderators have validated your Snapchat Lens, you can go to your Ad account. The filter will then be available in the "media object" section and can be used in the "Creative" section for your various campaigns.
You'll then need to create a new campaign and fill in all the necessary information, as you would for any other Snapchat ad, and choose the filter you want to sponsor in the media object.